• Skip to primary navigation
  • Skip to main content
  • Skip to primary sidebar
Source Digit

Source Digit

Linux, Ubuntu Tutorials & News, Technology, Gadgets & Gizmos

  • Home
  • How To
  • Ubuntu
  • Instagram
  • Blogging
  • Android
  • WordPress
  • +More
    • Cloud Computing
    • Gadgets
    • Social Media
    • Technology
  • Write for Us
Home / How To / Install Gscan2pdf on Ubuntu – Linux Document Scanner

Install Gscan2pdf on Ubuntu – Linux Document Scanner

By Sourabh / August 21, 2017 Category: How To, Ubuntu

Gscan2pdf 1.8.5 released. Install Gscan2pdf on Ubuntu Linux and also learn how to use Gscan2pdf. The gscan2pdf is a GUI to produce PDFs or DjVus from scanned documents.

Scanning is handled with SANE via scanimage. PDF conversion is done by PDF::API2. TIFF export is handled by libtiff (faster and smaller memory footprint for multipage files).

Install Gscan2pdf
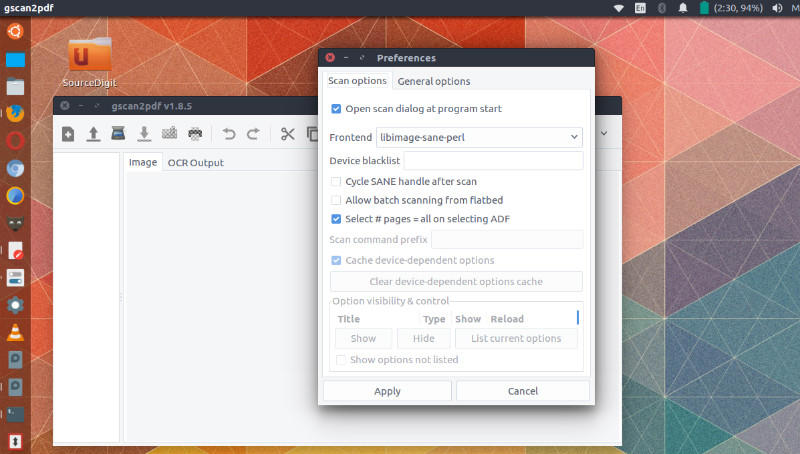
Run the following commands in Terminal to install Gscan2pdf:

sudo apt-get update
sudo add-apt-repository ppa:jeffreyratcliffe/ppa
sudo apt-get update
sudo apt-get install gscan2pdf

Once installed, open the Gscan2pdf from Ubuntu Dash.

How to use Gscan2pdf

1. Once installed, open Gscan2pdf
2. Scan one or several pages in with File/Scan
3. Create PDF of selected pages with File/Save

Command Line Options

Gscan2pdf has the following command-line options:

–device= Specifies the device to use, instead of getting the list of devices from via the SANE API. This can be useful if the scanner is on a remote computer which is not broadcasting its existence.
–help Displays this help page and exits.
–log= Specifies a file to store logging messages.
–(debug|info|warn|error|fatal) Defines the log level. If a log file is specified, this defaults to ‘debug’, otherwise ‘warn’.
–import=<PDF|DjVu|image> Imports the specified file
–version Displays the program version and exits.

Diagnostics

To diagnose a possible error, start gscan2pdf from the command line with logging enabled and check file.log.

gscan2pdf --log=file.log

Uninstall and Remove Gscan2pdf

If you want to remove Gscan2pdf from Linux Ubuntu Systems, run the following commands:

sudo apt-get remove --autoremove gscan2pdf
sudo apt-get update

Tags: canon linux scanner software, canon scanner linux, Download Gscan2pdf, Gscan2pdf 1.8.5, gscan2pdf download, gscan2pdf fedora, Gscan2pdf Linux, gscan2pdf mac, gscan2pdf ocr, gscan2pdf tutorial, gscan2pdf ubuntu, Gscan2pdf Ubuntu 17.04, gscan2pdf windows, how to use gscan2pdf, Install Gscan2pdf Ubuntu, linux document scanner, Linux Gscan2pdf, linux mint scanner not detected, simple scan download, simple scan linux, simple scan ubuntu, Ubuntu 17.04 Gscan2pdf, Ubuntu Gscan2pdf, ubuntu scanning software, Update Gscan2pdf

Primary Sidebar

Latest Posts

Ubuntu 25.04 ‘Plucky Puffin’ Is Available To Download

How to Login as Root User in Linux Terminal

Install Firefox In Ubuntu Terminal Command Line

How To Check Kernel Installed Date In Linux Ubuntu

How To List All Kernel Modules That Are Loaded In Ubuntu

Enable Ubuntu Auto Login Without Password

Download Ubuntu 25.04 Official Default Wallpapers

How To Fix Initramfs Error In Ubuntu Command Line

How To Check All Available Kernel Version In Linux Ubuntu

3 Best Artificial Intelligence Domain Name Generators

© 2025 Source Digit • Linux, Ubuntu Tutorials & News, Technology, Gadgets & Gizmos

  • Home
  • About
  • Privacy Policy
  • Terms & Conditions
  • Contact Us
  • Sitemap