Ubuntu 17.10 Upgrade. How to Upgrade to Ubuntu 17.10. Before you upgrade and install Ubuntu 17.10, open a terminal window and run the following command to update all software.
$ sudo apt-get update

$ sudo apt-get upgrade

$ sudo apt-get dist-upgrade
Now follow the steps given below:
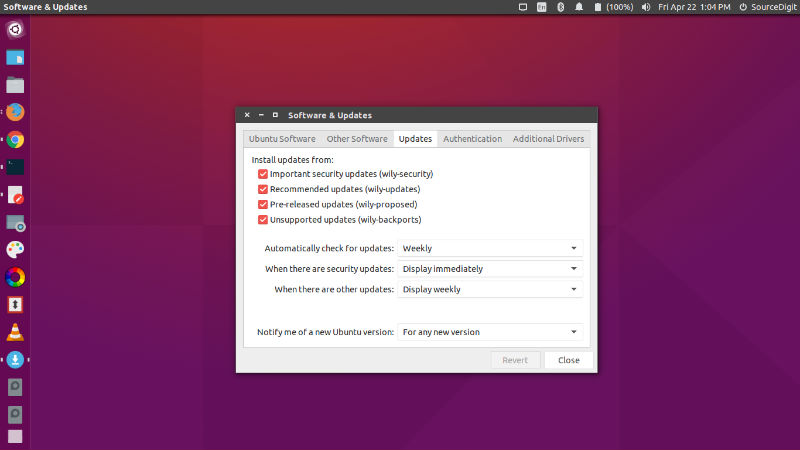
- Open Software & Updates. Search for it Ubuntu Dash.
- Select the “Updates” tab.
- Now under Install Updates from” click the box next to “Pre-released updates”

- Select Notify me of a new Ubuntu version” to “For any new version”
Once done, run the following command
update-manager -d
The -d option is to check the Ubuntu update manager for any development release.
- Open “Update Manager” from the Unity Dash and check for any new updates
- In a few minutes, you’ll see the prompt: “New distribution release ‘16.10′ is available.”
- Click Upgrade and follow on-screen instructions.
- Enter username and password. You will also be asked to confirm the process, please select Enter.
- When the upgrade is complete, restart the system.
Once you are logged in after the system upgrade, you will have to update the system once again. This will fetch all the necessary files and install all the necessary updates for Ubuntu 16.10 Systems.
You can also run the upgrade process using the following command:
sudo apt-get update

sudo do-release-upgrade -d
When the upgrade is complete. Please reboot the system.
