How to schedule WordPress posts. Learn how to schedule blog posts in WordPress. Easily schedule WordPress posts and control when the WordPress blog post gets published.
WordPress has a built-in WordPress post scheduler feature which can help you to add a publish time for your WordPress blog posts. Lest us see how:
How to schedule blog posts in WordPress
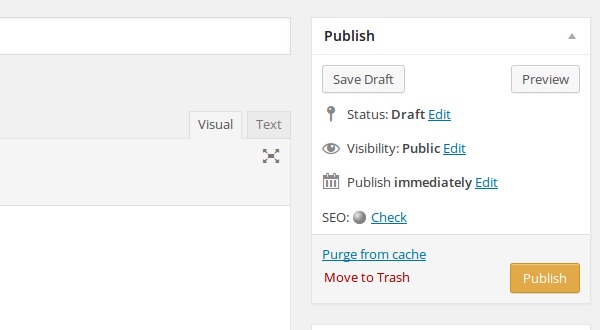
Write your WordPress blog post in normal way, but before you press publish button, click the edit link next to Publish. WordPress posts scheduling feature is found in the Publish box, upper right side of the post editor page.

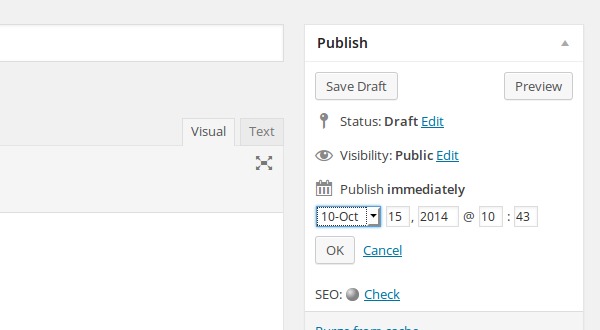
When you click the edit link next to Publish, you’ll now see a drop-down option to schedule your post. You can select the month, date and year to publish the post. You can also select the time – hour and minute.

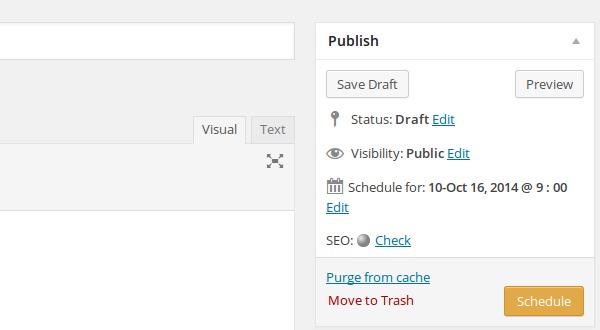
For example, if you’d like to publish this post at 9 a.m. tomorrow (16 October 2014), set tomorrow’s date and time for 9 a.m. and click Ok. Now you can see the Schedule button has appeared and highlighted (blue colour). Click on the Schedule button to schedule the blog post.
Once you click the Schedule button, you’ll see the status of this WordPress post has is shown as scheduled. The post shall be published and visible on the exact date and time set for scheduled.

You can also change the scheduled post to publish it immediately or re-schedule it. To do so, click the Edit link next to the scheduled publish time and update the date and the time.
