How to fix brightness function key not working in Ubuntu Laptop. Resolve and fix brightness control not working for Ubuntu 14.04/14.10 and Linux Mint 17 Systems.
To fix this issue, let’s first find out the graphics/video card being used in Ubuntu and Linux Mint Systems. Open Terminal and run the following commands to know what video card used for the Ubuntu Systems:

ls /sys/class/backlight/
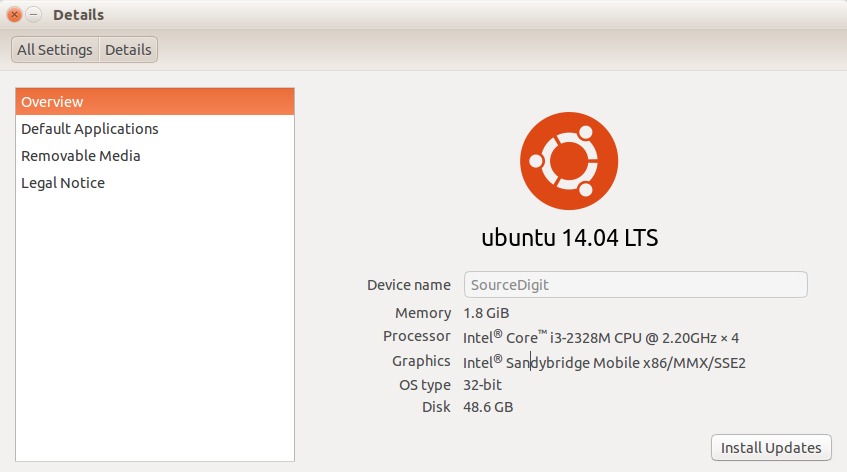
Another way to find out the information about the graphics card is via the System Settings. Open System Settings > Details > Graphics.

Here you can see the graphic card’s name in use. As you can see in the screenshot, the graphics card in use is Intel (Intel® Sandybridge Mobile x86/MMX/SSE2).
Now as we know that the graphics card on the System is Intel, follow the steps given below to fix brightness control issue with Intel card in Ubuntu and Linux Mint Systems:
Open Terminal and run the following command to create the configuration file:
sudo touch /usr/share/X11/xorg.conf.d/20-intel.conf
Now open the file in any editor and edit the file. Run the following command to edit the file:
sudo gedit /usr/share/X11/xorg.conf.d/20-intel.conf
Once the file is opened, add the following lines to the file:
Section “Device”
Identifier “card0”
Driver “intel”
Option “Backlight” “intel_backlight”
BusID “PCI:0:2:0”
EndSection
Save the file and exit. Noe restart the system and the brightness control should be working fine.
Using Norbert Script
You can also download and use sysvinit-backlight script that automatically remembers the screen brightness level and loads the backlight levels on boot, reboot, or wake up from sleep.
Open Terminal and run below commands to add the script from Norbert’s PPA:
sudo add-apt-repository ppa:nrbrtx/sysvinit-backlight
sudo apt-get update
sudo apt-get install sysvinit-backlight
You can also add the script directly from PPA packages page. Please note that the script works fine for Ubuntu 14.10, Ubuntu 14.04 and Ubuntu 12.04 Systems.
