Mount Partition automatically on start up in Ubuntu 15.04/14.10/14.04 Systems. Automatically mount partitions – How to mount Ubuntu partitions automatically on start up.
Mounting partitions automatically can be initiated via per-user mounting (usually under /media) or systemwide mounting (anywhere, often under /mnt).
Let us learn how to mount Ubuntu partitions automatically:
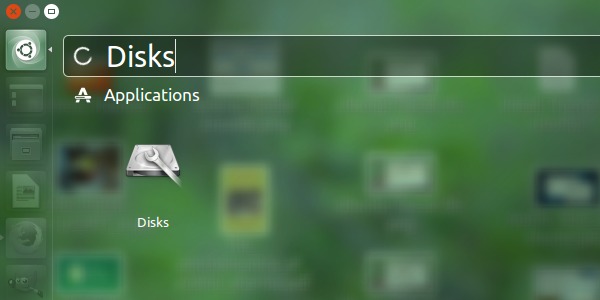
- Open Dash and search & open Disks utility.
- Click on it to open Disks utility tool.

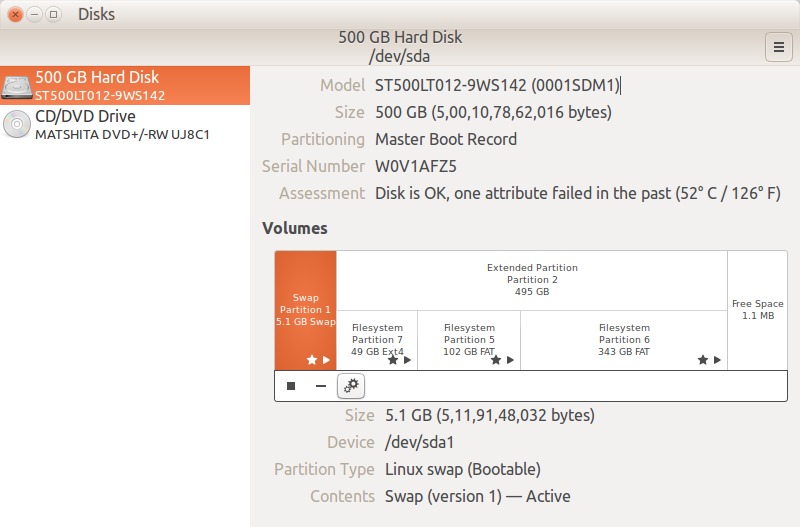
Disks utility is a tool to manage disk drives and media. Using Disks utility, one can format and partition drives and mount and unmount partitions.
- When it opens, you can see complete information about the Hard Disk partitions on Ubuntu System.
- Select the hard disk partition you want to mount automatically.
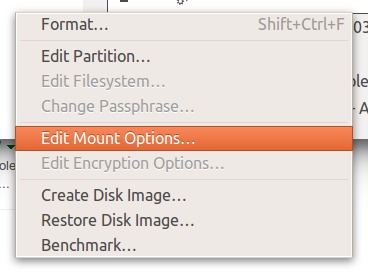
- Click the settings-icon/gear and select “Edit Mount Options…”
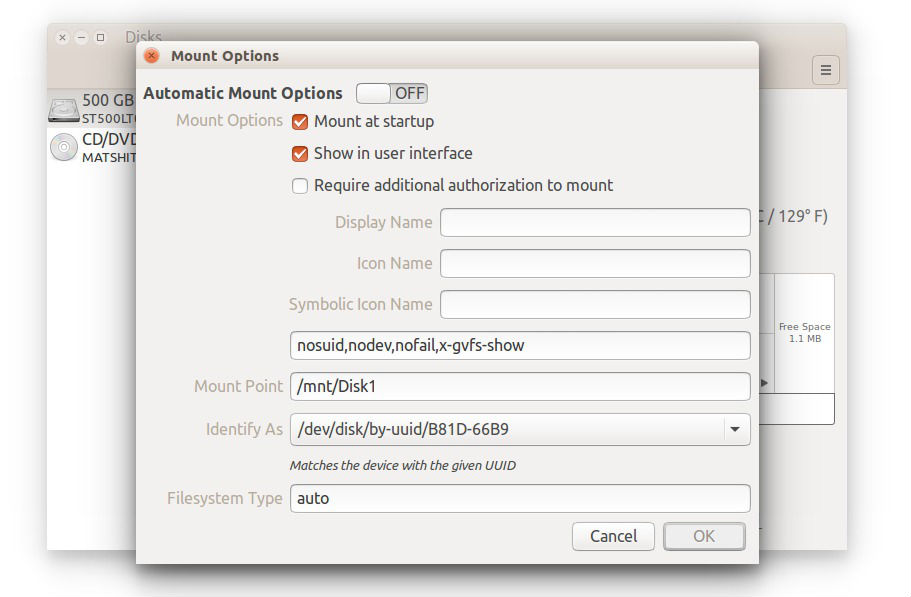
- In the Edit Mount Options… window:
- Turn on “Automatic Mount Options”


Please note that there is a bug in Ubuntu 14.04 systems. Which doesn’t display the partitions on System startup (sometimes, after auto-mounting).
- To remove this, please un-check “Show in user interface” and leave “Display Name, Icon Name, Symbolic Icon Name” empty.
Also note that even if after following the above step, you are unable to see the partitions, please check “Show in user interface” option. But, you will have to leave “Display Name, Icon Name, Symbolic Icon Name” empty.
- Edit Mount Point and write a suitable name for the partition.
If you want to auto-mount more than one partitions, please re-do/repeat the steps on other partitions.
