How to remove or delete PPA in Linux Ubuntu. 2 ways to remove a PPA in Ubuntu – Remove a PPA from Software Sources (GUI method) in Ubuntu and remove a PPA using Terminal commands in Ubuntu.
The commands line method is further divided into two methods. Below are the 3 ways to remove PPAs in Ubuntu:
- Remove a PPA from Software Sources (GUI method)
- Using -remove Command
- Downgrading PPA Using ppa-purge
Personal Package Archives for Ubuntu
Personal Package Archives (PPA) is a way to distribute software and updates to Ubuntu users. PPAs allow to upload Ubuntu source packages to be built/published as an apt repository by Launchpad.
Using PPAs Ubuntu users can install PPA packages in a regular way. All they have to do is to install PPAs and they’ll automatically receive updates associated with the PPA. Once installed, PPA Packages remain onto Ubuntu System until it is removed manually or they’re superseded by another package.
In simplest way, to add a PPA, we run the following command:
$ sudo add-apt-repository ppa:PPA_NAME
Where “PPA_NAME” is the name of the Personal Package Archive (PPA) you wish to add or install.
Although installing a PPA is simple, removing PPA is quite confusing for many. Luckily there are more than one methods to remove PPAs from Ubuntu. Here’s how to:
Method 1: Remove a PPA from Software Sources (GUI method)
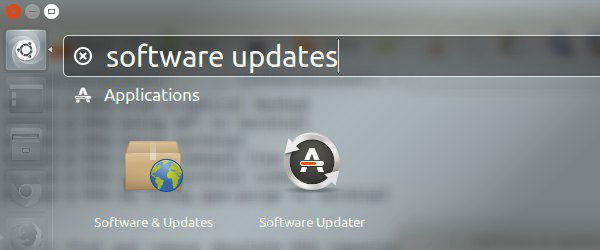
Removing a PPA from Software Sources is the most easiest way, using GUI method. To begin with, open and type Software Sources in Unity dash. Click on the icon to open Software Sources.

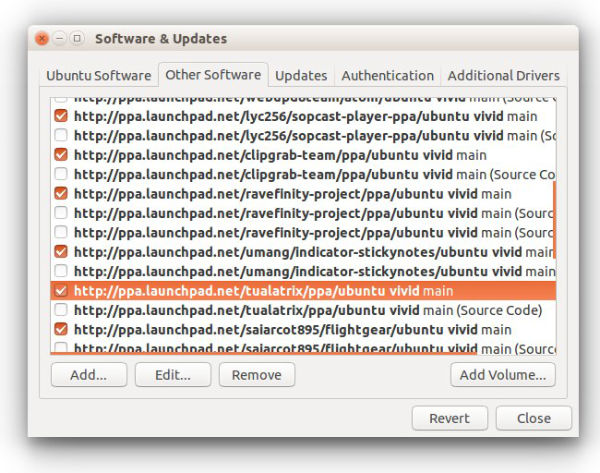
In the Software Sources window, click Other Software tab and select the desire PPA from the list (you wish to remove). Click on Remove button to remove the desired PPA.

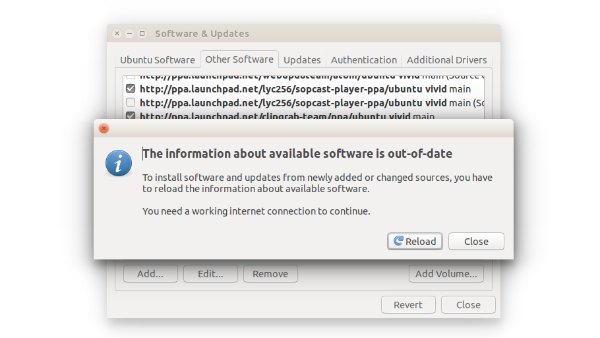
Once you have removed the PPA, you may get an onscreen meesage saying
“The information about available software is out-of-date. To install software and updates from newly added or changed sources, you have to reload the information about available software. You need a working internet connection to continue.”

Click OK and update the software sources and packages.
Method 2: Using -remove Command
PPAs can be removed using add repository command with –remove parameter. The command removes the PPA from Ubuntu repository. THis method removes PPA, but it doesn’t remove or downgrade any package that have been installed using the PPA. Which means, it will only remove the PPA, but not the software or package installed using the same PPA.
Using the add repository command with –remove parameter is easy. The command takes the following format:
$ sudo add-apt-repository --remove ppa:PPA_NAME/ppa
Like the above method, the command does not delete or modify any packages installed or upgraded using the PPA.
Method 3: Downgrading PPA Using ppa-purge
This is the most strong method to remove PPAs. Unlike others, the ppa-purge method will delete a PPA as well as all packages or softwares installed/upgraded using the PPA.
To use the ppa-purge command, you will need to install ppa-purge package. To do so, run the following command:
$ sudo apt-get install ppa-purge
Once installed, run the command to remove a PPA repository and all the packages installed using it. The command takes the following format:
$ sudo ppa-purge PPA_NAME
Last but not least, You can also remove PPAs by deleting the .list files from /etc/apt/sources.list.d directory.
