How to share files using Samba in Ubuntu Linux. How to install Samba in Ubuntu 16.04 using Terminal. How to use Samba server – Learn Samba server configuration in Ubuntu. Samba is a popular cross-platform file and print-sharing solution.
Installing Samba
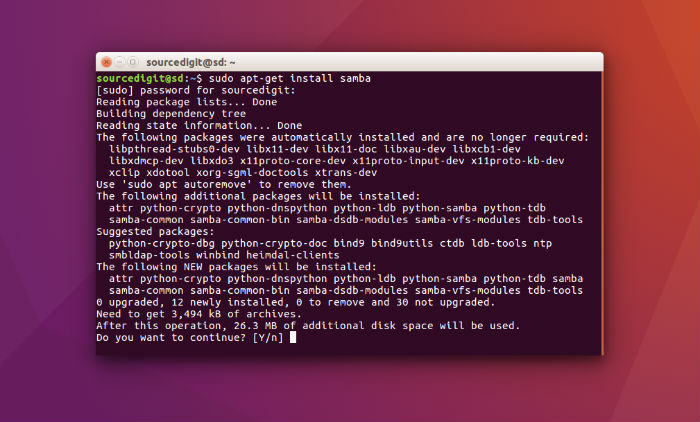
Samba is not installed on Ubuntu Systems by default. Users have to install Samba additionally. Run the following command in terminal to install Samba:
sudo apt-get install samba
Users can also install Samba via the Ubuntu Software Center.
Configuring Samba
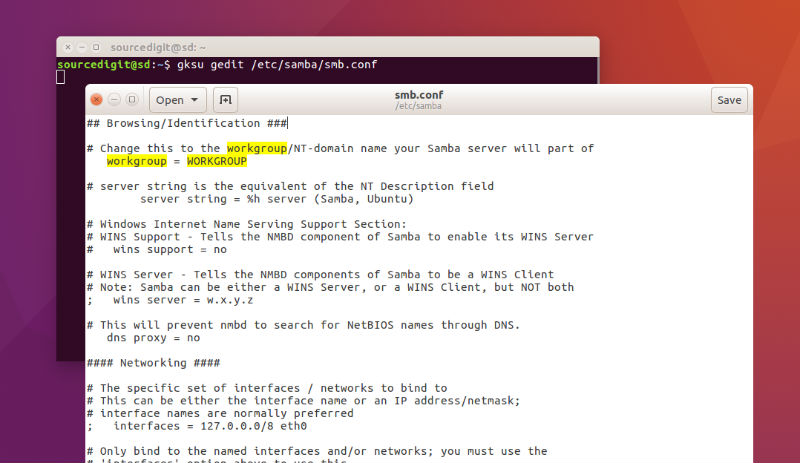
The default configuration file (Samba configuration file) is commonly found at /etc/samba/smb.conf or /usr/local/samba/lib/smb.conf. Run the command given below to edit and configure main Samba configuration file. Please note that to configure Samba via CLI you will need root privilege or simply use sudo.
gksu gedit /etc/samba/smb.conf
The first thing to edit is “workgroup” and “security” key/value pairs in the [global] section of /etc/samba/smb.conf:
workgroup = EXAMPLE
…
security = user
Please note that the security parameter can be found at the bottom in the [global] section, and is always commented by default. Under the “Share Definitions” section you can edit and configure the files/folders that you want to share with others.
For example, if you want the Home folder to be accessible via Windows, uncomment and remove the “;” at the front of the following lines:
[homes] comment = Home Directories
browseable = yes
valid users = %S
Change the browseable value to “yes” (read description below).
For a directory to share, either create a new section at the bottom of the file or uncomment the following:
[share] comment = Ubuntu File Server Share
path = /srv/samba/share
browsable = yes
guest ok = yes
read only = no
create mask = 0755
Description of the above parameters:
- path: the path to the directory to share.
- browsable: enables Windows to browse the shared directory via Windows Explorer application.
- guest ok: allows clients to connect to the share without a password.
- read only: Read only mode or write/edit privileges to be granted. Write/edit privileges are allowed only when the value is no. If the value is yes, then access to the share is always read only.
Setting Samba User Password
Another most important aspect of configuring Samba is to set user password and/or add a Samba user. To add a specific username to the Samba user lits, run the following command:
sudo smbpasswd -a
Please remember to replace with the desired username. Apart from adding the existing username, you can also create a new user account. To create a user account, use the following command:
adduser
Create Directory and Change Permissions
Run the following commands to create directory and grant the permissions:
sudo mkdir -p /srv/samba/share

sudo chown nobody:nogroup /srv/samba/share/
Finally, restart the samba services to enable the new configuration:
sudo restart smbd

sudo restart nmbd

sudo systemctl restart smbd.service nmbd.service