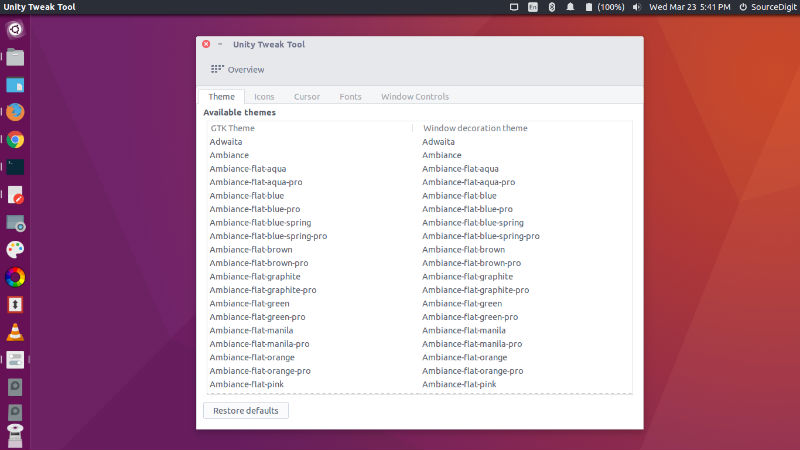
New Ubuntu users, learn how to install Themes and Icons on Ubuntu 17.04. Here’s how to install Themes in Ubuntu 17.04, manually or via PPA. Change Unity Desktop themes on Ubuntu with Ubuntu/Gnome Tweak Tool or via Terminal Commands. You can download and install custom themes in Ubuntu 17.04.
There are two ways to download and install themes in Ubuntu:
- Install Themes via PPA – Run terminal commands to install themes via PPA using Terminal commands
- Install Themes Manually – Download the custom theme file and install them manually

Install Themes Manually
Ubuntu users can manually download the theme and install it on their Ubuntu Systems. If you download the custom theme file, you will have to extract theme file to ~/.themes or /user/share/themes directory. You can directly download the theme files and extract it to the theme folder and use it.
To use the downloaded Ubuntu theme:
- Extract and move the theme to usr/share//themes directory. For security reasons, Themes folder is restricted to use. Luckily, you can also create a folder in your Home directory (name it .theme) and extract the zip archive (downloaded theme) there.
- Use the theme via Ubuntu Tweak Tool. Open Ubuntu Tweak Tool and go to the Tweaks tab, and select the Theme option. Choose the theme you wish to use from the list.
Install Themes via PPA or Terminal Commands
When you install themes via a PPA using Terminal, all you have to do is execute the command and rest is done by the system itself. For example, to install Numix Icon Theme, run the following commands in Terminal:
sudo apt-add-repository ppa:numix/ppa

sudo apt-get update

sudo apt-get install numix-icon-theme numix-icon-theme-circle numix-icon-theme-shine numix-icon-theme-utouch
Once the Theme is downloaded on the Ubuntu System, it can be used. You can also use the downloaded/installed Ubuntu Themes using Ubuntu configuration tools such as Ubuntu Tweak Tool, Unity Tweak Tool or GNOME Tweak Tool.
