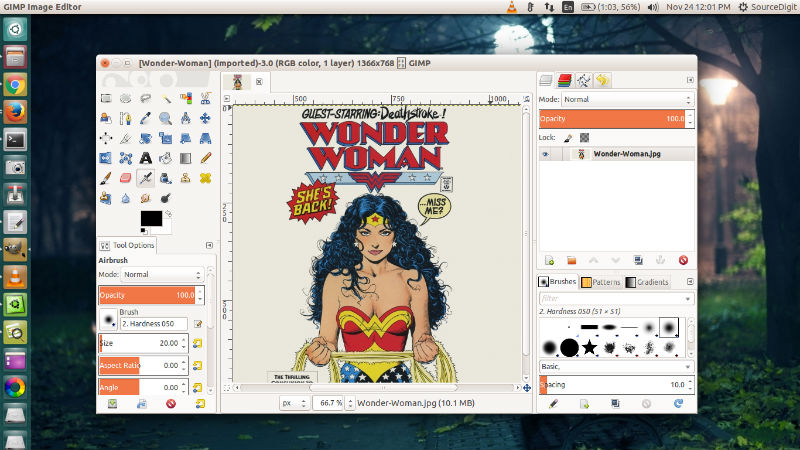
Learn how to use Gimp in Ubuntu. Must-know Gimp tutorial for beginners and Photoshop users. See how to install Gimp in Ubuntu using terminal.
GIMP 2.10.12

The new version ships with far more new features, including new and improved tools, better file formats support, various usability improvements, revamped color management support, a plethora of improvements targeted at digital painters and photographers, metadata editing, and much, much more. GIMP 2.10.X has the new dark theme and symbolic icons enabled by default. This is meant to somewhat dim the environment and shift the focus towards content.
There are now 4 user interface themes available in GIMP: Dark (default), Gray, Light, and System. Icons are now separate from themes, and we maintain both color and symbolic icons, so you can configure GIMP to have System theme with color icons if you prefer the old look. Moreover, icons are available in four sizes now, so that GIMP would look better on HiDPI displays.
Install GIMP Image Editor 2.10.12 in Ubuntu
Run the following commands in terminal to Install GIMP Image Editor 2.10.12 in Ubuntu:
 sudo apt update
 sudo apt upgrade
 sudo apt-get install snapd
 sudo snap install gimp
Gimp Tutorial For Photo Editing
Crop an Image
There are numerous reasons you may want to crop an image. You may want to remove useless borders or information for aesthetic reasons, or you may want the focus of the final image to be of some particular detail for instance.
The procedure to crop an image is straightforward. You can either get to the Crop Tool through the tools palette:
- Crop Tool Crop Tool on the Tools Palette.
Or you can access the crop tool through the menus: - Tools → Transform Tools → Crop
GIMP Crop Tool cursorOnce the tool is activated, you’ll notice that your mouse cursor on the canvas will change to indicate the Crop Tool is being used.
Now you can Left-Click anywhere on your image canvas, and drag the mouse to a new location to highlight an initial selection to crop. You don’t have to worry about being exact at this point, as you will be able to modify the final selection before actually cropping.
After making the initial selection of a region to crop, you’ll find the selection still active. You can click and drag any side or corner to move that portion of the selection.
Once you are done with the region to crop, you can just press the “Enter” key on your keyboard to commit the crop.
Rotate & Flip an Image
a. Flip an Image
If you want to flip your image, the Transform menu offers two options, Flip Horizontally, or Flip Vertically. This operation will mirror your image along the specified axis.
b. Rotate an Image
Image rotation from the Transform menu is contrained to either 90° clockwise/counter-clockwise, or 180°. Arbitrary rotations are handled on a per-layer basis, while the image rotation described here is applicable to the entire image at once.
Resize an Image
To resize the image to new dimensions, we need only invoke the Scale Image dialog:
- Image → Scale Image
This will then open the Scale Image dialog.
- In the Scale Image dialog, you’ll find a place to enter new values for Width and Height. If you know one of the new dimensions you’d like for the image, fill in the appropriate one here.
You’ll also notice a small chain just to the right of the Width and Height entry boxes. This icon shows that the Width and Height values are locked with respect to each other, meaning that changing one value will cause the other to change in order to keep the same aspect ratio (no strange compression or stretching in the image).
Remove Background of an Image in GIMP
To remove background of an image in GIMP means separating an object from its background. To remove backgrounds in GIMP works not only for solid colour backgrounds, but actual photographic backgrounds as well.
To do this, you must first use GIMP’s selection tools to draw a selection around your subject. This is not an easy task, and selecting the correct tool is crucial. You have several tools to accomplish this.
- The “Free Select Tool” allows you to draw a border using either freehand or straight lines. Use this when the subject has a relatively simple shape.
- The “Intelligent Scissors Select Tool” lets you select a freehand border and uses edge-recognition algorithms to better fit the border around the object. Use this when the subject is complex but distinct enough against its current background.
- The “Foreground Select Tool” lets you mark areas as “Foreground” or “Background” and refines the selection automatically.
Once you have selected your subject successfully, use Select → Invert. Now, instead of the subject, the background is selected. What you do now depends on what you intended to do with the background.
a. To fill the background with a single color:
Click the foreground color swatch (the top left of the two overlapping colored rectangles) in the toolbox and select the desired color. Next, use “Bucket Fill” to replace the background with your chosen color.
b. To make a transparent background:
Use Layer → Transparence → Add Alpha Channel to add an alpha channel. Next, use Edit Clear or hit the Del key on the keyboard to remove the background. Please note that only a small subset of file formats support transparent areas. Your best bet is to save your image as PNG
c. To make a black-and-white background while keeping the subject in color:
Use Colors → Desaturate. In the dialog that opens, cycle between the modes and select the best-looking one, then click OK.
Saving and Exporting an Image
Once you are done scaling the image, don’t forget to export the changes you’ve made:
- File → Export…
to export as a new filename, or: - File → Overwrite {FILENAME}
to overwrite the original file (use caution)
