
HexChat IRC Client 2.14.3 has been released. How to install HexChat IRC Client on Ubuntu Linux.
HexChat is an IRC client based on XChat, but unlike XChat it’s completely free for both Windows and Unix-like systems. Since XChat is open source, it’s perfectly legal. HexChat was originally called XChat-WDK which in turn was a successor of freakschat.
Features
- Easy to use and customizable interface
- Cross-platform on Windows and Unix-like OSes
- Highly scriptable with Lua, Python, and Perl
- Translated in multiple languages
- Fully open source and actively developed
- Multi-network with auto-connect, join, and identify
- Spellcheck, Proxies, SASL, DCC support and more
HexChat IRC Client 2.14.3
Run the following commands in terminal to install HexChat IRC Client on Ubuntu Linux:
sudo apt update sudo apt install flatpak flatpak remote-add --if-not-exists flathub https://flathub.org/repo/flathub.flatpakrepo flatpak install flathub io.github.Hexchat flatpak run io.github.Hexchat
Once installed, you can start using IRC.
Using HexChat
The first time you start HexChat you’ll see the Network List as seen below:
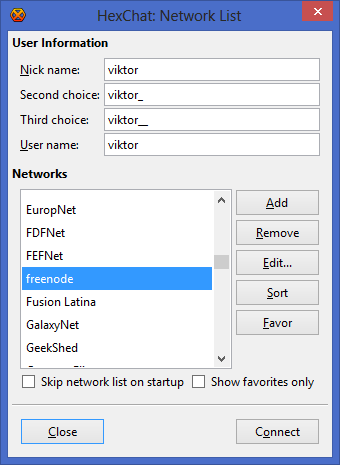
Here you can specify your global logon details. The Nick name will be your name visible in IRC channels (or second/third choice if it’s already taken), and the User name is how you identify yourself to the server. You can pick a server from the default list, or if it’s not there, you can add your own by clicking the Add button:
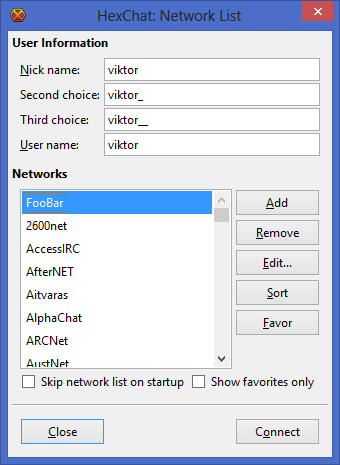
After you named it, click Edit… and specify the details of your connection. You need at least the following information to join to a certain group of people:
- server address
- server port
- channel name
You can see an example below:
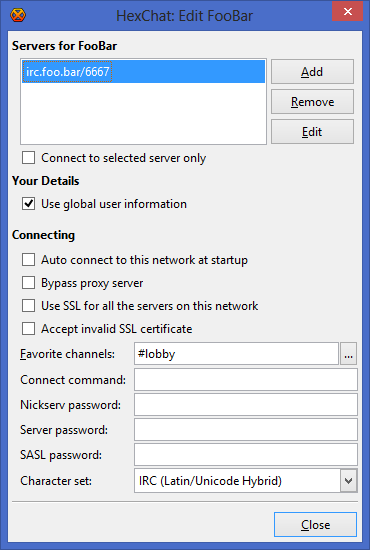
In this example, the server address is irc.foo.bar and the port is 6667. The channel of choice is #lobby. Favorite channels are joined to automatically upon connecting to the network. After you finished editing, click Close to return to the Network List. Now select the network you want to connect to and click Connect. After a successful connection you’ll see the following window:
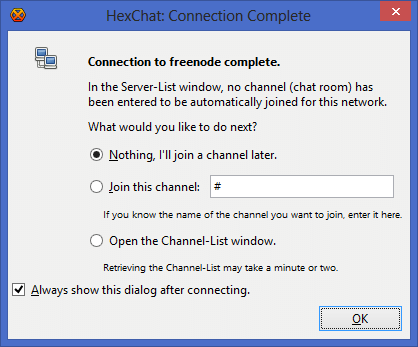
If you don’t want to join a channel just yet, leave it as it is. If you know the channel name already, specify it with the second option. In case you want to browse through the channel list, select the third option. Then press OK to close this window. After you successfully joined a channel, you should see something like this:
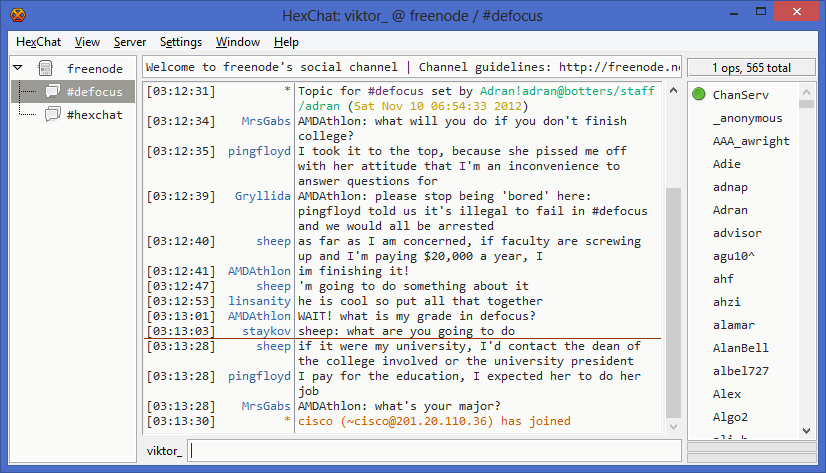
That’s it, you’re online. Now you can learn more about HexChat and customize it for your needs. This website is a good starting point, but you can find a lot more on the net. Have fun!